

Hello, crafty friends! Today I am guest designing with Papertrey Ink. Their sweet team reached out to me a while back asking if I’d like to craft with them, and I jumped at the chance. I have loved their stamps and dies for many many years. This month’s release is filled with sweet florals and love images perfect for the upcoming Valentine holiday as well as spring which will be here before you know it! For now, let me show you how I created this card…

Step 1: Die Cutting
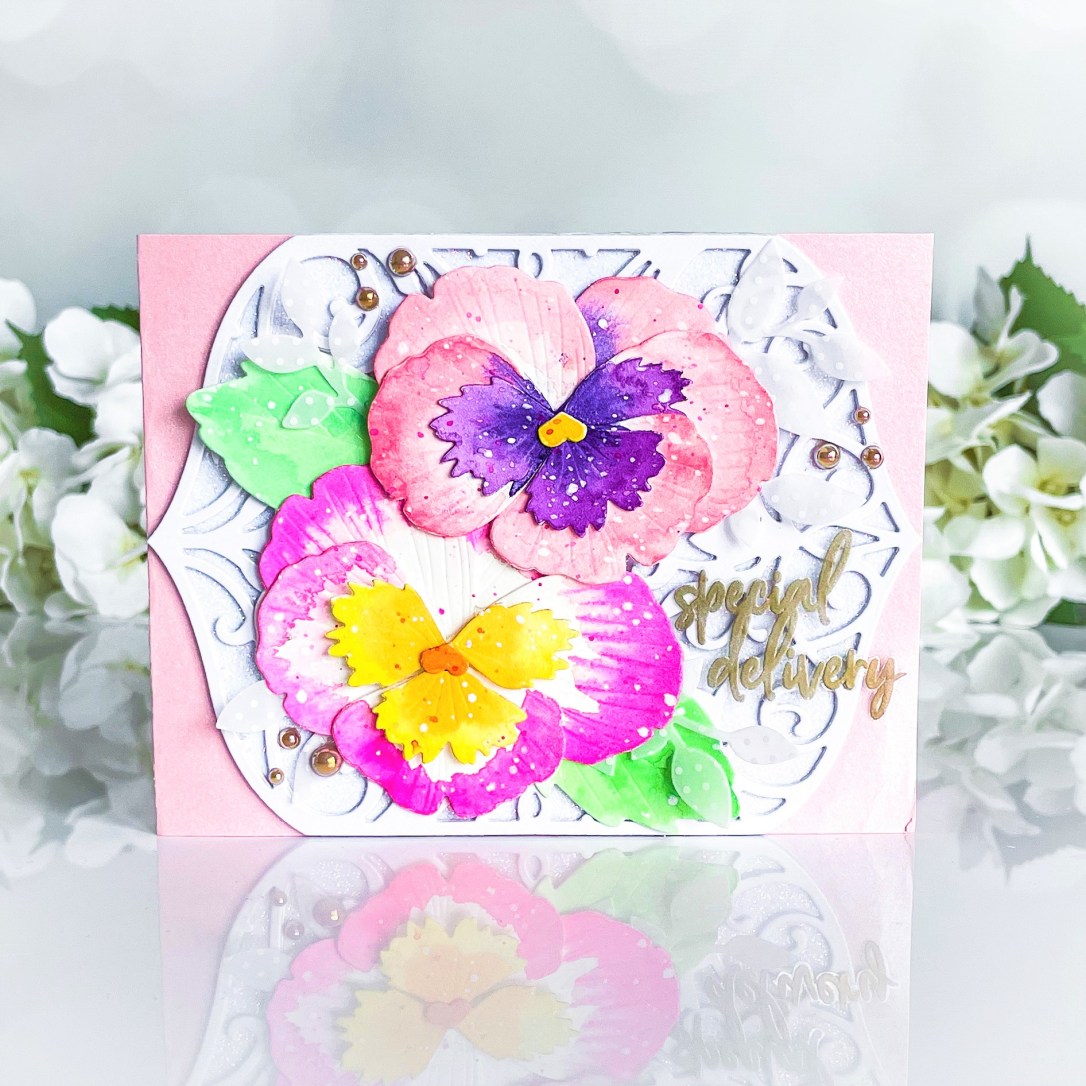
The first item from this month’s collection that caught my eye was the newest addition to the PTI “Into the Blooms” collection. These pansies are so beautiful. I knew I wanted to watercolor them in loads of different color combos, so I went to town die cutting them from watercolor paper.

Step 2: Watercolor
I did a quick search online for inspiration on all the color combos pansies come in. It was difficult to narrow down my choices because there are so many, but I settled on a palette of bright & pastel tones in pink, purple, and a bit of yellow/orange.

Step 3: Assemble
Once my individual petals were dry, I layered them up using liquid adhesive. Because I didn’t avoid over saturating my layers with water as I typically do, the petals dried in a beautiful soft wave mimicking real flower petals, so I didn’t need any foam adhesive to create dimension either. I also flicked watered down white pigment ink over the assembled blooms just because I like it!

Step 4: More Die Cutting
I suppose I could have added this step into the initial die cutting step, but I didn’t know where I was going with this project at the time. It wasn’t until after I made the blooms that I settled on making a card. Using the new Cover Plate: Elegance die, I cut out and stacked up two layers in white and a third in a white shimmer cardstock for the top. I also picked out a piece of white sparkle card for the A2 base.

Step 5: Heat Embossing
Since I didn’t want to cover up too much of the beautiful back ground, I heat embossed my sentiment with gold onto heat resistant acetate and trimmed out just the right side leaving me a tail to tuck and secure behind one of the blooms, so I didn’t have to fuss or worry about adhesive showing.

Step 6: A Little More Die Cutting
At this point I had dry fit all my pieces and still felt it needed something, so I trimmed away the excess from the cover plate background I made and secured it over a piece of pink cardstock. I also pulled out a bit of scrap vellum and cut a few pieces using the Branching Out die, so I would have a few translucent bits to tuck in and around my blooms again trying my best to add things that wouldn’t completely cover the beautiful background.

Step 7: Embellish
Once all the pieces were stuck together, I went back and added some bling to match the gold embossing.
And there you have it! That’s my finished card. If you’re wondering what happened with the rest of the pansies I watercolored, then you’ll have to come visit me again soon, and I didn’t let them go to waste!
If you’d like to check out more of my projects, please visit me on Instagram, Facebook, Pinterest, and now YouTube as well. Until next time… stay crafty! – Laura Evangeline
Great explanation of these dies!! Thank you! I couldn’t quite understand the extra petals and now I do.